MY PROJECT.......KABATI LA TV LA MBAO YA MNINGA.....DESIGNED AND DELIVERED AT TEGETA

Hii ni kazi yangu pia....ni kabati la TV lililotengenezwa kwa mbao ya *Mninga* lenye sehemu 3 za shelf unazoweza kuziunganisha pamoja kama inavoonekana na ukitaka pia unaweza kuzitenganisha!
Nilipokea oda ya kutengeneza kabati hili kutoka kwa mteja wangu wa Tegeta....
....lina sehemu ya kuwekea TV, deki, decorder, shelf 2 ambazo unaweza kuweka picha za familia, vases za maua, speakers etc...

Nili design in a way that unaweza kuli merge...yaani unaweza pia kutenganisha na ku rearrange vile unataka, hizo shelf 2 za pembeni ukaweka separate na hilo kabati la katikati.
Fancy Home Decor inapokea na oda za furniture za mbao aina yoyote... mninga, mkongo etc.. 

To press your order Call now  +255 0712 023102
Karibu.


Hapa likiwa tayari limewekwa sehemu yake...
Kabla hatujaliweka mahali pake...

A painted fireplace

Well HELLO all! I’ve been working my butt off on the fireplace this week! I don’t have a totally finished product to show you but I’m SO excited about the direction it’s going so I wanted to share. I went a little out of my comfort zone and I love it.

Sunday I had had enough with the unfinished mess and started tackling the fireplace and built ins. I thought it would take me a couple days max – HA! I’m on day five and have a good four days of work left. I way underestimated how much needed to be done.

It’s a beast – the fireplace is massive and the built ins have a lot of surface area to paint as well. On Sunday this is how the one holding our TV components looked:
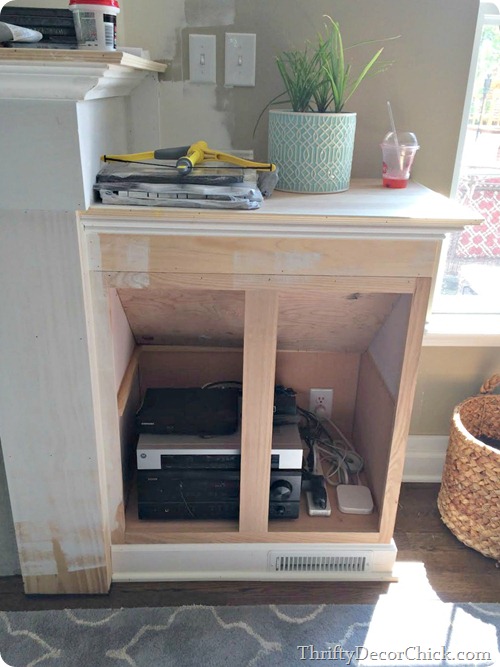
built ins by TV

Hot mess. I’ve had guests and friends over for weeks with it looking like that and I could have cared less. All the sudden on Sunday I couldn’t take it one more minute. It’s how I roll.

And yes, I was equipped with a cherry icee. Ignore the poor plant that has become a snack for the cats.

My first order of business was to fill alllllllll the holes:

trim on built ins

I didn’t worry about all the cracks because those were getting covered later. But I filled and sanded, then caulked the whole thing top to bottom.

THEN came the priming:
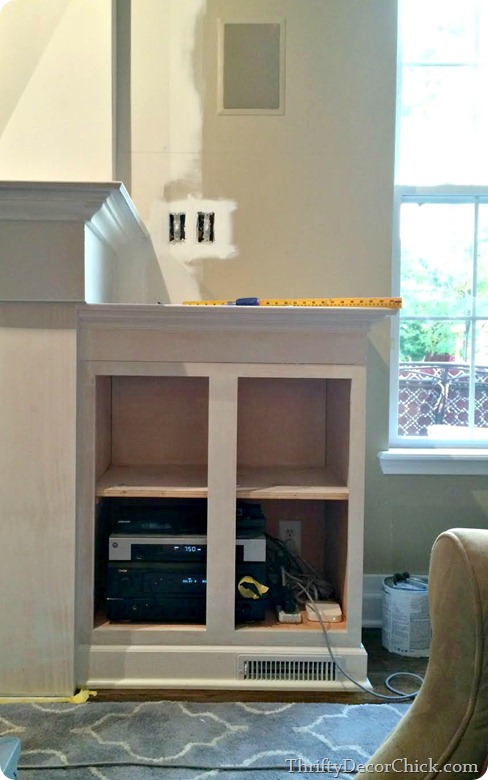
short built ins by fireplace

I got all that done in the first day – by the second day I had my white semi gloss paint in hand and started painting the first coat…but stopped myself. You can’t tell from the pic above because the board and batten isn’t done over there – but it was a whole lotta WHITE. I love white trim as much as anybody (well, more than anybody), but the white built ins against the white board and batten was feeling a little blah.

I had been playing with the idea of painting the whole thing out in a light gray all along. Somewhere along the line I talked myself out of it – I didn’t feel like it would look right without enough contrast. But I had that white paint in my hand and couldn’t get the idea out of my mind. I wanted this area to really pop and as it was it wasn’t happening.

I had an idea percolating in my head and looked back through some pictures I had saved to get up the guts to follow through. When I saw this photo I had bookmarked the decision was made:

19mebeckdesign (source)

GoodNESS people. That is stunning! I’m so obsessed with contrast anyway – white trim against a dark wood floor, black door against white trim…so this is right up my alley.

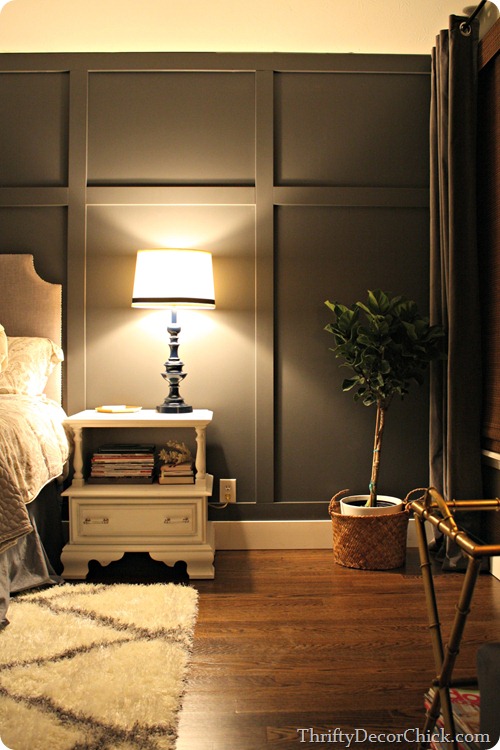
I was sold. The bonus was that I already had the paint – I LOVE the Peppercorn color I used on our master bedroom wall: IMG_8768And it looks identical to the gray in that photo!
This family room gets LOADS of light now that the wall is down. It’s glorious. I’m not worried about the room feeling dark with all the natural light and especially not with the mostly white walls throughout the whole space:

board and batten

So I put a coat of the gray on – and I was a little nervous but loved it. I started installing the decorative trim and fell in love a little more:

trim on fireplace

And then with another coat I was head over heels:
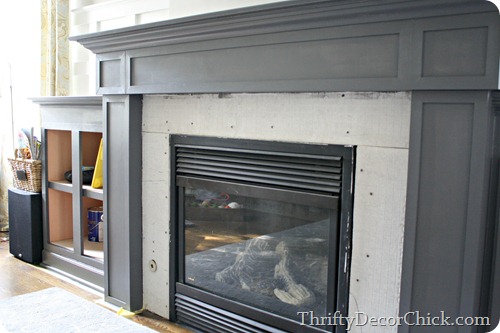
gray fireplace

Oh my goodness – it is a step out of my norm but I’m loving it.  I think doing something that feels a little uncomfortable at first is so important to do in your home as well as in life. At least once and a while. :)

It still needs another coat – the paint I had is an eggshell finish so I’m grabbing a quart of the same color in semi gloss to finish it up. After all this work I don’t want to worry about scuffs (which are a lot more noticeable on a darker paint):

gray fireplace

The past couple of days I’ve been working on the cabinet doors – can’t wait to show you those too! And I still need to paint the inside of the cabinets but that may just happen later (cause my hands and wrists are screaming uncle):
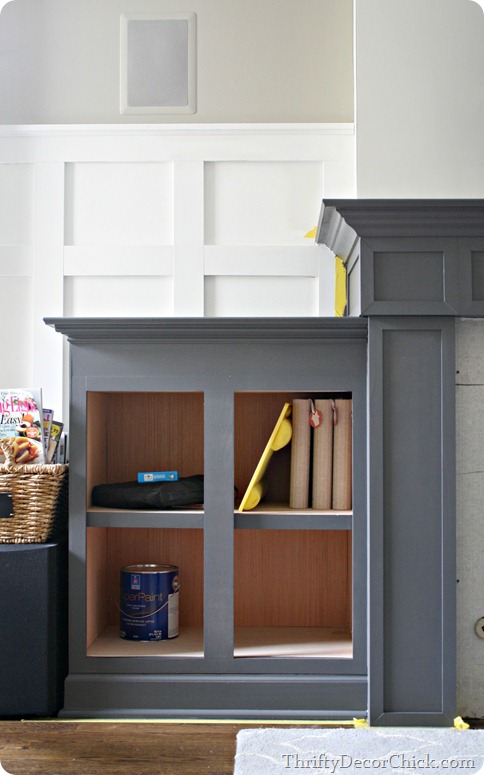
gray fireplace with built ins

Today I’m finishing up the doors and then I’m hoping to get started on the tile for the surround. I’ve been trying to decide on one of these for weeks:
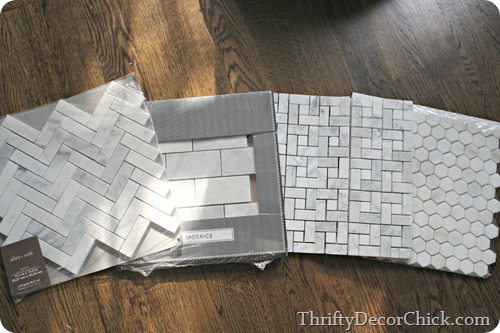
gray and white marble tiles

The first and third from the left have been around the whole time – the subway and the hexagon were later additions. :)

It’s now down to the the subway:

marble subway tile

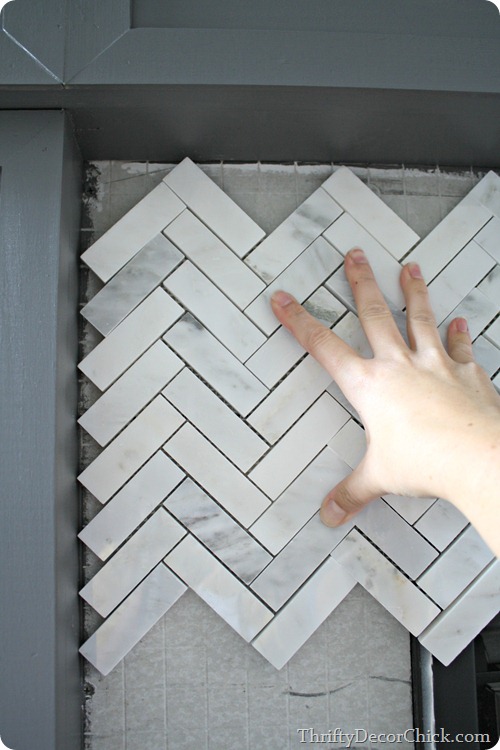
Or the herringbone:

marble herringbone tile

The herringbone has always been my favorite but I’ve been intimidated by the small cuts I’d have to do. But as I was holding it up to take this picture I realized I could just cut it down so it fits centered – I can just cut each side off evenly and installed it that way. No small cuts needed to fill in all those spots. I could do the same for the top as well so I don’t risk losing a finger. ;)

So…now that I realized that I think I’m going for the herringbone. Ugh, I’m pretty sure. They are both classic designs so it’s a hard decision.

There you go! More progress – and I went dark! After the I finish up the doors and the tile (over the next few days), then I’ll focus on the wall treatment above the fireplace and around the TV. Then I’ll give everything one final coat…and I’ll be done! I’m not stopping till I get there – but it will probably be next week. I’ve got my 20 year reunion this weekend so I’ll be taking some time out to party. :)

Could you do a color other than white on built ins or a fireplace? It’s not for everyone – but it does give it some drama and certainly makes it the centerpiece of the room. I don’t know if I could do a whole room in such a dark color but little bits of it make me giddy.

MY PROJECT: KITANDA CHA CHUMA DELIVERED KWA MTEJA KIJITONYAMA...

To order call +255 0712 023102


MASHUKA PURE COTTON AVAILABLE NOW IN 6 PIECES... SHUKA 2 FORONYA 4.

Tuna deliver pia....

To order Call +255 0712 023102
Karibuni

Ready for fall!

Hello my friends!! It’s SEPTEMBER! I’m so happy – it’s the best time of the year. Well, it will be the best time of the year soon, when Mother Nature starts acting right and cools it with the humidity.

We have a couple more really hot days this week and then I’m hoping we’ll be home free – I see nothing but temps in the 70’s in the forecast after that. Whoot! And yes, I KNOW…fall doesn’t start for another 21 days. But the start of September is official enough for me. I’m burning a pumpkin candle right now to celebrate.

Because I’m so excited about this time of year I decided to share some of my favorite fall projects from years past – looking through these makes me all cozy and lovey and make me want to go put on a sweater and some boots.

I’ve made quite a few fall wreaths over the years but this simple pumpkin wreath is one of my favorites:

fall front porch

It’s crazy easy – stick the (half off!) fall fillers from Hobby Lobby into the wreath and you’re done.

I kept it over our fireplace in the back one year too:

fall pumpkin wreath

I LOVE the red and orange colors together. I don’t use these colors in our home any other time of the years but I LOVE them right now.

This felt wreath took forever, not gonna lie. But I love the texture:

felt fall wreath

Next time I’d like to do it in reds, browns and orange as well – but it will be awhile before my fingers can face all that cutting again. ;)

And my all time favorite wreath was also my cheapest -- this one was made with dollar store leaves:

dollar store fall wreath

I made it four years ago and just had to get rid of it a few months back. :( It held up pretty darn well considering it was put into storage every year! I don’t know if the dollar store still carries these pretty leaves but I hope so. I’d like to make another one.

I always pick up a bunch of tiny pumpkins to decorate with this time of year. I shared a few quick and easy ideas heredecorating with pumpkins

They are cute, cheap and you don’t have to store them year to year!

I’m still in love with the fall tablescape I put together last year:

fall tablescape

Those flowers are my Pee Gee hydrangeas – they start out white in the summer and are just now starting to turn a light green. They’ll be this gorgeous greenish pink soon:

fall entertaining

LOVE them.

Speaking of tablescapes – my DIY wood trough-thingy is awesome when it comes to decorating for any season. Drop the stuff in, fluff and you’re done:

wood fall centerpiece

I think it would be beautiful in the middle of a dining room table!

Last year I got crafty with some fall scrapbooking supplies and created some fall art:

fall leaf printable

You can download that printable to use yourself here.

Our fall mantel was simple and pretty last year – it didn’t scream fall but that’s why I loved it:

candy corn bunting

You can see how I made that candy corn bunting here.

I made a few other candy corn crafts years back too:

candy corn crafts

I don’t like the taste of them, but I think they’re darn cute for decorating. ;)

I LOVE decorating outside this time of year too. It’s the simplest decorating ever – pumpkins and mums and a some candles and you’re done:

outdoor fall decor fall table

pumpkins and mums outside

Oh my goodness, so lovely. I’m hard at work in the family room so I can start to focus on more fall decor in the house! I’m hoping to have the fireplace done by the end of the week – it’s a beast and is a ton of work. But I think it’s going to look amazing!!

Are you ready for fall? The older I get the more I love summer, but now that the kiddo is back in school the lazy days of summer are long gone for us. So I say, BRING IT ON. :)

September before and after!

Hello all and welcome to the before and after link up, Labor Day edition! Hope you’re having a lovely holiday weekend!

I’m kicking this month’s highlights with a few kitchens that caught my eye – yes, I’m now unabashedly in love with white kitchens. I think they are classic and never age – you have SO many opportunities to play with color, textures and wood tones in a white kitchen.

I love Jessica’s touch of brick on her kitchen island:

DIY brick wall

The brick is an unexpected touch that adds some warmth and color that I love!

Laura’s kitchen is gorgeous as well – she painted her cabinets and the backsplash and the difference is astounding:

painted cabinets glass doors

Her floors, decor and countertops keep a warm feel in this space. It is gorgeous!

I’ve been watching Sally’s kitchen renovation for months and the final result did not disappoint!:

white kitchen long island

That big island has all kinds of storage and functions, love it all!

OK, I’m done with the kitchens for today. ;) I’ll always love a good DIY orb light fixture and Kristi’s turned out beautifully:

DIY orb light fixture

Saving a couple hundred bucks is always a good thing!

I have a feeling I’ve highlighted some of this room before, but it’s so good I don’t even care. ;) Jennifer shared her son’s finished room and it looks SO good:

wood plank wall boys room

I LOVE that wood wall and the colors she used throughout. There’s some great storage in there too.

And finally, I was shocked when I read that this floor in Jessica’s bathroom wasn’t tile:

hexagon vinyl floor

I LOVE it! You can see what it is and how to install it here.

As always, there is so much talent at this party every month! If you’d like to be considered for next month’s round up, copy and paste this code at the end of your post or just include a link: 

<div align="center"><a href="http://www.thriftydecorchick.blogspot.com/" title="TDC Before and After" target="_blank"><img src="http://www.homestoriesatoz.com/wp-content/uploads/2012/03/beforeAndAfterButton_thumb1.gif" alt="TDC Before and After" style="border:none;" /></a></div>


Now it’s time to see what you’ve been up to! If you’ve been up to any fall projects already feel free to include those. ;) I am so excited for my favorite season of the year!!


Chef John is on Vacation!

Just wanted to let everyone know that I’ll be on vacation this week, visiting family in New York (my last one this year, I promise). Of course, we’ll continue to publish your comments and questions while I’m away, but I won’t be around to answer them. That means you’ll have to rely on your fellow foodwishers, which I’m sure will work out just fine. 

By the way, many of you have been contacting me with suggestions for my 1,000th video, which is only a few uploads away. If you have an idea, please pass it along. Thanks, and we’ll see you next week!

.

Blog Archive