Boozy Strawberry Blueberry Cheesecake Popsicles and the Pursuit of Happiness

Is there any better way to celebrate the birth of our great nation than with these red, white, and sort of blue popsicles? Before you answer, I should mention they’re actually strawberry and blueberry cheesecake ice pops, and also spiked with booze.

Like much of our country, these are very simple, and get a little more interesting when you add a few shots of alcohol. I used vodka for its neutral flavor, but my scientist friends tell me any liquor will work just the same. However, be sure to measure carefully, since too much or too little alcohol and/or sugar syrup will adversely affect the frozen texture.

I didn’t want anything too icy, and it’s the alcohol and sugar that keeps this from freezing rock solid. If you leave out the booze, you’ll get a firmer ice pop, so you’ve been warned. I’m not sure how to adjust to compensate, so you may want to grab a regular fruit ice pop recipe on Allrecipes.com and use it instead.

I joked about our Founding Fathers being proud of this particular pursuit of happiness, but the more I think about it, I bet they would have been; especially that Ben Franklin guy. Dude liked to party. So, whether you make these on the 4th of July, or not, I really hope you give them a try soon. Enjoy!


Ingredients for 6 Boozy Strawberry Blueberry Cheesecake Popsicles:

For the simple syrup:
3/4 cup sugar
1/2 cup water
(This makes extra. Use it for lemonade and ice tea)

For the strawberry layer:
1 1/3 cup trimmed and quartered strawberries
1 1/2 tablespoon simple syrup
1 1/2 tablespoon vodka

For the cheesecake layer:
4 ounces (1/2 cup) room temp cream cheese
1 1/2 tablespoon simple syrup
1 tbsp vodka

For the blueberry layer:
1 1/3 cup trimmed and quartered blueberries
1 1/2 tablespoon simple syrup
1 1/2 tablespoon vodka

DIY stencil (fail and save!)

Hello all! I hope your weekend was a great one! Ours was jam packed – we did a ton of family stuff, I got to hang with friends quite a bit and we went to a couple Fourth festivities as well. It was one of those weekends that is exhausting but leaves you feeling so incredibly blessed. I am a lucky lady.

So I didn’t have time to do much DIY this weekend but I did finish up a small project I started last week. This one started one way (a bit of a fail) and ended up another – I was determined to salvage it because I loved the look.

It all began when I found this platter at Target a few weeks back:

arrow platter

I think it was from the Nate Berkus line? I loved the arrow design in gold and knew I could recreate it for cheaper. It wasn’t too bad at $25 but my constant “Pushaw, I could TOTALLY do that for cheaper” usually wins out. And one day on a HomeGoods trip I found a large platter on clearance for $8 to try this myself – score!

Then I got started making my DIY stencil. I used my trusty FrogTape® to do it – I cut a piece long enough to span the whole platter, then laid the tape down on a cutting board:

using painter's tape to make a stencil

I just cut it freehand – this is not a time to be picky. There are times when I want something to look “perfect” but most times I like it to look a little more organic, so the different sizes and spacing didn’t bother me at all.

It only took me about 15 minutes to cut them all out – it was actually quite soothing. :) Sometimes I love a detailed project like this, it calms me.

After my “stencil” was done I laid it across the platter:

stencil from painter's tape

It was going to look so good!

And then I realized the paint I was using wasn’t going to work. It was way too thin and didn’t stick right at all – I was SO bummed. I mean, come on – it was going to look so similar to the other platter. And mine was even bigger! But…fail.

I was about to scrap the whole thing but I realized I could use the arrow design somewhere else to add a little somethin.’ Arrows are HUGE right now, right? I was at a jewelry party yesterday and bought an arrow ring. I see them so much lately.

Anyway, I have a little pen holder in my office that I thought would look cute with a little embellishment so I decided to try the stencil there:

DIY arrow stencil

My arrows were spaced out so I had to tear the long strip of tape up and make them work closer together.

I used gold Rub n Buff and it took no time at all to add a little bling:

gold arrow design

I only did every other panel because I didn’t want it to get too busy. I flipped the tape every other one so some go up, some down:

arrow stencil design

I love it! I have a few gold/brass accents in here so it ties in nicely. I didn’t realize till after I was done that it is the same look as my FrogTape trash can too:

farmhouse table as desk

So there you go – quick and easy and free. I was determined to put my little arrows to use somewhere and I think this is a sweet little spot. I have to say I must have pulled that tape off of the surfaces at least ten times and it still stuck at the end and didn’t tear apart even with the delicate design. I was quite impressed.

Have you incorporated the arrows in your home at all? Are they still trendy? Usually I get on the trends way after the fact but I’m thinking I’m still good on this one. ;)

MASHUKA QUALITY...PURE COTTON BED COVERS AVAILABLE FOR SALE AT FANCY HOME DECOR(TZ)

Fancy Home Decor ina design na kuuza mashuka mazuri na quality. 
Haya ni baadhi tu ya mashuka tuliyokwisha kuyatengeneza na ambayo yapo tayari kwa kuuzwa. Zinapatikana katika size zote ...ni material ya cotton na inakuwa ni seti ya shuka 2 na foronya 4.

Karibu mdau ujipatie seti yako ubadilishe muonekano wa kitanda chako na kadhalika chumba chako.
Mashuka mazuri yatakufanya ujisikie vizuri wakati wa kulala na pia kuongeza mvuto chumbani. 
Kitanda kikiwa kinabadilishwa kwa kutandikwa mashuka ya design na rangi mbalimbali mara kwa mara pasipo kurudia rudia shuka hilo hilo moja kila siku; ni dalili inayoonyesha kuwa wewe dada, wewe mama unajitambua, unatambua wajibu wako kama mwanamke na unajipenda!
Nunua mashuka yako mengi ya kutosha ya rangi mbalimbali na  designs mbalimbali, panga vizuri kabatini alafu unakuwa unayatandika kwenye kitanda chako kwa kuyabadilisha mara kwa mara.Itapendeza sana.

Karibu sasa uweke oda yako...

Call us 0712 023102


Floral design...
Stripes design...


Kwa leo ntaishia hapo...ntakuwa nkiendelea kuwaonyesha na ku share designs tofauti za mashuka, duvet etc...Please keep following and stay tuned!!!


Next Up: Red, White & Booze


Dining room built ins

Hello my friends! How are you? My sister-in-law and nephew have been here all week and this is our last day with them. I’m excited we have a sunny day (I think ALL day) to do something fun!

In celebration of two anniversaries recently – ten years in our home and my blogging anniversary – I’ve been sharing the progress of some of the rooms in our home over the years. By the way, I totally forgot about my blogging anniversary when it hit – six years at the end of May. Whoot!!

I ALWAYS struggled with our dining room. I don’t know why. Part of it was that shortly after we moved in I marched myself to the furniture store and bought a complete set of dining furniture. I liked it OK – but I wasn’t madly in love with it. I just wanted to fill the space. Now I know better and would wait it out, but you know how that goes.

Long ago I added molding to the walls (with Liquid Nails! No.) and jazzed up the ceiling:

I also recovered the seats of the chairs almost immediately to add some color to the room. It was very beige/brown.

You’ll see here that this was my gold and red phase as well. Ah yes…

I still wanted some more contrast so I changed up the drapes and added a solid red to the bottom:

two tone drapes

Then things just got crazy and I painted the whole room (the entire. room.) brown:

brown dining room

You know, looking back, I don’t hate it. It was dramatic and pretty – I say you can go dramatic in two rooms safely – the powder room and the dining room. Or all the rooms, it’s your house.

I always struggled with the fact that this room opened up to our two story living room so I just added a piece of trim down the wall to separate them. Probably a major design crime but you know, I like to live on the edge.

But the thing is…it was DARK. Shocking, I know!:

brown dining room

I didn’t mind it much till we had new floors put down after a water issue. Then it was positively cave-like. Dark on every surface in the room and I couldn’t take it anymore.

A new idea formed in my head over time that I talked about here. I was tired of not using this space. I wanted to make it more functional and change up how we used it.

So the DIY built ins began:

how to build built ins

You can see the synopsis of how my Dad and I built them here. It wasn’t hard, just time consuming. It took me forever to get them finished – eight months total I believe.

I had a design in my head all those months of thinking about it and a big part of that design was lights at the top of the bookcases. It took months to find something that was affordable but I finally found what I wanted in the outdoor section:

inexpensive library lights

And now…I love it. This room is one of my favorites in our home.

I could not be more pleased with how it turned out:

DIY built ins

It’s been about a year and a half since they were finished and they are holding up great. I’m really proud of Dad and I for tackling it. :)

Funny thing is, the plan all along was to put a coffee table and four chairs in here, but we moved our old kitchen table in here a year or so ago and it’s become my husband’s office in the summer months:

dining room built ins

He has a basement office but can’t stand to be down there without natural light in the summer. So although his stuff laying around kind of drives me batty, I love that we’re actually using it. Many of you have suggested adding a more casual table back in here and the idea is growing on me. Plus, finding four matching (comfy) upholstered chairs is so dang expensive!

I can’t forget the other view of the dining area – it’s really more of a landing/hallway of sorts. I found this before shot of our stairs that I didn’t know I had:

And I showed you this more recent after here:

wood staircase

Such a difference! (Here’s the how to on pulling the carpet off of stairs.)

Many of you have asked how much I spent on the built ins and I’m not positive of the cost because we did them over such a long time. The kitchen cabinet bases were $320 total and the butcher block from IKEA was $130. I’m guessing we put in another $150-200 in trim and wood (I used basic pine wood for the actual bookcases). And the lights came to $140. So a rough estimate is about $750-800 for 12 feet of built ins.

I would have paid three times that to have them done. Easily.

So there’s a look back at what is now one of my favorite spaces in our home! It was one of my problem children before though. :)

Do you have a dining room? Do you use it? Have you considered changing up how it’s used?

P.S. Check out my tips on decorating bookcases in this post.

Have a great weekend!

Pickle Brine Chicken – I Need to Give You Props

The chicken breasts seen herein started off as nothing more than a couple of props for our recently posted “How to Make a Brick Grill” video, but they came out so well, I decided to show you what I think is a pretty neat trick.

And let’s face it; there aren’t a lot of great uses for leftover pickle juice. I did hear recently that some people like to drink this stuff after jogging, which I found to be quite shocking, since I had no idea people still jogged.  

As you’ll see, I only let mine brine for about 2 hours which seemed to be enough. I’ve heard that you really only need about one hour per inch thickness of meat, and that rule of thumb seems to work for me. These breasts were tender, juicy, and flavorful.

Speaking of flavor, you can probably just go with the straight pickle juice as a brine, but I hedged my bets with a little extra salt, sugar, and pepper. Like most brined recipes, the payoff is in the texture and moisture content, and not necessarily in the taste, but having said that, these did have a nice little twang.

So, the next time you have nothing left in the pickle jar but the juice, you now know what to do, and I don’t mean take up jogging. I hope you give this a try soon. Enjoy!


Ingredients for 2 breasts:
2 large boneless skinless chicken breast
olive oil to coat
salt and pepper to taste

For the brine:
1 tbsp brown sugar
2 tsp kosher salt
1 tsp freshly ground black pepper
pinch of cayenne
1 1/2 to 2 cups dill pickle juice

Easy outdoor entertaining

Hello all! Well, I’ve said it before and I’ll say it again – I enjoy summers SO much more the older I get. I think it has a lot to do with the fact that my kiddo is in school now so I cherish the long, warm days all the more. But part of it is that I just appreciate our wonderful outdoor spaces more after a long, hard winter. We all know this past winter was one of those times five.

My thing when hosting anything outdoors is to buy as little as possible specifically for outdoors. ;) I do have some outdoor plates, but beyond that I try to use items that can be used both inside and out. And even more so, I like to find ways to make regular home decor items work for entertaining. 

We plan to host a few outdoor parties this summer so I was excited when Kirkland’s asked me to showcase some of their items for a summer soiree:

outdoor entertaining ideas

I LOVE those drink dispensers and was actually quite pleased with them – some of these can be finicky – they drip and malfunction a lot. But these did great. And I love that there are two and a stand for both of them!

Here’s something weird about me -- now that I’ve given up soda I don’t drink caffeine at all anymore – I’ve never liked coffee or tea. But I tried this sweet tea that my husband loves and I liked it. It was really good. What is happening to me?? Liking both summer and tea now? I’m a whole new person. I’ve always thought the idea of sipping some iced tea on a hot summer day sounded so sweet and now I may just try it. :)

So as I mentioned, my favorite part of outdoor entertaining is figuring out how to make regular indoor home decor work outside. I used one of their kitchen decor items (this cute beverage bottle) as a vase for my hydrangeas: 

hydrangeas in bottle

It has a lid that seals well but flips open like a vintage bottle – love it!

I used one of their hanging mason jars as a utensil holder:

easel chalkboard

No plastic silverware – just the regular stuff will do just fine. :)

A decorative box doubles as a napkin holder:

box for napkins

Napkins are always flying away in the wind so this was a perfect solution! The chalkboard part is just black vinyl stuck on the glass – super easy and works just great as a chalkboard! (I use a chalkboard pen so I can easily wipe it off.)

I have to talk about the chalkboard a bit more cause it’s adorable. Their drink dispensers come with the chalkboard labels on chains:

double drink dispensers on stand

And even some chalk! :)

A decorative basket corrals the plates easily – this would perfect when using paper plates outside too. It keeps them away from the wind and the elements:

tips for outdoor entertaining

And the basket was useful in another way too – I was able to fill it up with most of  the serving items and carry them out and back in easily:

outdoor entertaining

It’s the little things. :)

It’s been a while since I’ve visited Kirkland’s and I have to say I was pleasantly surprised. Everything was seriously adorable and the prices were fantastic:

glass drink dispensers

Kirkland’s is offering $250 to one of you to spend as you wish at their store or online! That will go a crazy long way. Check out the other beautiful outdoor entertaining ideas at Beneath My Heart, Home Stories A to Z and Just a Girl as well.

You can enter the giveaway by using this Rafflecopter doodad below. It’s easier and more private than leaving your email in the comments. Have fun and good luck! :)


a Rafflecopter giveaway

Kirkland’s partnered with several bloggers to raise brand awareness and all received compensation in gift cards. All purchases and content are on my own accord and reflect my personal opinion and style.

Blackberry Almond Buckle – You May Want to Loosen Your Belt

First things first; this type of rustic dessert is called a buckle because of how the fruit sinks into the buttery batter as it bakes, and “buckles” the surface with its juicy weight. 

I believe you’ll find my completely made-up explanation in the video a little more interesting, but regardless of the etymology, this blackberry buckle is no joke.

I added a handful of almond meal, since I had it around, and I think almonds and blackberries have a thing for one another. It seemed to work out nicely, although it did make things a little denser; which in this kind of thing isn’t necessarily a bad thing. 

Same goes for the toasted nuts on top. Leave them off it you want, but I liked the crunch. I was going to tell you to use any berry you want, but I changed my mind. This really needs to be done with blackberries. Raspberries are a little too delicate; as are strawberries, and blueberries are barely berries to begin with. For me, it’s blackberries or bust. I really hope you give this a try soon. Enjoy!


Ingredients for 8 Portions Blackberry Buckle

3 cups fresh blackberries
2 tbsp white sugar if your berries are sweet, 3 if they need some help
1 tsp vanilla extract

For the batter:
1 1/4 cups all purpose flour
3/4 cup white sugar
1/2 cup almond meal
2 tsp baking powder
1/4 tsp salt
pinch of cinnamon
1 cup milk
8 x 12 baking dish with 6 tbsp hot melted butter poured in.

- Bake at 350 degrees F. for about 1 hour

Next Up: Blackberry Buckle


Fireflies in the trees

So I’ve wanted to do this little project for the longest time, and I finally got the courage up this weekend. It involved one little part that totally had me intimidated.

I’ve always wanted to hang DIY glass lanterns along the trees in our backyard – I’ve seen it done with mason jars and regular jars and I’ve planned to do it for years. But I knew it would mean I’d have to drill a hole in the bottom of the glass to do it.

Otherwise they will fill up with rain water and I’d have to dump them regularly and I know myself and myself would never do that. So they’d become little mosquito breeding grounds and those guys like me enough as it is.

SO. I knew all along I’d need to drill holes in them to avoid mosquito production and my well being. :) I finally bit the bullet and just did it this weekend. My original plan was to use mason jars, but I didn’t want to put a hole in the ones I have because I use them quite a bit during the fall and holidays. So I took a trip to Goodwill, where I’ve gotten EVERY ONE of my mason jars over the years, and they had none. None!! Well, I did find one itty bitty baby one marked at a dollar, which just annoyed me so I put it back.

You know how I feel about Goodwill prices lately. :)

So I was just going to use food jars and wire, but then while shopping the other day I found some super cute mason jar versions for $2.99 each (Kirklands). For that price it was worth it to just get them instead of DIYing – they had cute wire already and everything. They are SO much cuter than a jar too!

Here’s what I ended up needing to drill the holes:

drilling into glass

The drill bit gets hot so you need to have water near the spot you’re drilling. You can do that by just pouring it constantly, but you need three hands to do that. (Or you can stop constantly to pour.) I found the easiest way was to fill a bucket just higher than the height of the jar.

I picked up a drill bit just for this, and it was pricey at $18, but I know I’ll use it for other things in the future. There are two types of glass cutting bits:

glass drilling bit glass drilling bits

I used the one on the left. From my understanding you won’t be able to use these on tempered glass, so don’t try it on that. (It just won’t work.)

Getting started was the hardest part. I was seriously wondering if I’d be able to even do this because the bit kept skidding all over the place. You need to start at an angle at first, not flat – so the bit can get a grip on the glass. how to drill a hole in glass

This pic was a little later when I had straightened it out a bit more, but it gives you an idea of how I did it in the bucket.

Once you get that grip it’s easy, but that’s the hard part:

how to put a hole in glass

Those half moon shapes are where I started. Once you get those going you can straighten out the bit and put it straight down:

hole to drill into glass

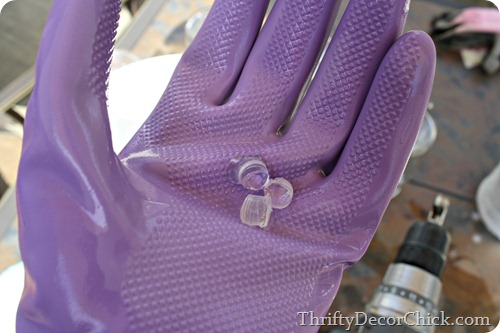
By the way – use gloves, eye protection and if you are not doing this in a bucket of water, I’d use a mask as well. With the water there was no need for that.

OH, and use a cordless drill. No water and electricity please. :)

When you get the bit going it’s not bad at all – you just have to be patient. You don’t want to push too hard, just let the bit do it’s thing. I’d say each time took about 30-45 seconds of drilling once I got a good grip:

drilling a hole in glass

Here’s what you’re left with:

I got overconfident by my fourth one and pushed too hard:

drilling into glass safety

Nice. I was pushing the drill too hard and it pushed through. So just be patient! Patience is really not my thing.

I seems intimidating but honestly it wasn’t bad at all. Having the glass under water was a huge help because I wasn’t worried about the bit getting hot or glass flying everywhere. Overall it was actually kind of a cool DIY.

I’ve had little indoor/outdoor tea lights from IKEA for a about a year for this project:

mason jar lanterns

By the way, I used the wire from the jar that broke to make another lantern with a jar from the fridge. :)

I hung them from the trees along the back:

mason jar lanterns in trees

And waited for the sun to go down:

DIY mason jar lanterns

I have these tea lights in white and yellow and love the yellow out there – I feel like they look more like fireflies or something. :)

I can’t find the lights online at IKEA though. I hope they still carry them because I want more:

jar lanterns for outside

Now I want to do this along the whole length of the yard – how pretty!:

mason jar lanterns in trees

I want them everywhere. ALL THE JARS.

Of course we have to turn on each light but that’s no biggie –- we won’t use these every night. I’m pretty much in love with them though:

mason jar lights in trees

I’ll be making more but will be raiding the fridge for jars to the do the rest.

I love how they turned out and love that they’ll have very little upkeep – I’ll probably have to clean them every month or so, but they are secure (I made sure not to hang them too close to each other so they won’t bang together during storms) and will drain easily.

I knocked two things off my list – a project I’ve been wanting to do forever and a DIY that I’ve always been too intimidated to attempt. :) Here me roar.

The possibilities are endless now that I know how to drill through glass. Have you ever tried it? I’ve seen tutorials on cutting wine bottles and that looks interesting as well.

Blog Archive