Decor steals!

Hello friends and happy Thanksgiving/Black Friday! I hope your holiday was wonderful! Mine was just lovely, I have much to be thankful for. Today I’m thankful I’m not going out in the crowds and shopping and instead staying home and decorating and maybe doing some shopping from the comfort of my couch. :)

Are you with me? :) If so my friends at Decor Steals are back and I just realized today is their four year anniversary and we’ve been working together for all of those four years! Sniff. I remember them when they were just a babe…

decor-steals-LOGO.jpg[7]

If you aren’t familiar with them, Decor Steals is a deal a day site – you can find unique decor items you won’t find anywhere else…and you’ll find them for a great price. Let’s jump in to see a few of their latest/upcoming goodies, shall we?

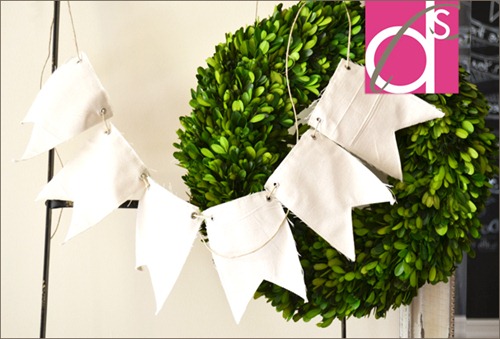
This cute bunting would be pretty as is but wow, think of all the possibilities:

feedsack bunting

It would be lovely with some glittery letters on it, draped across your Christmas mantel!

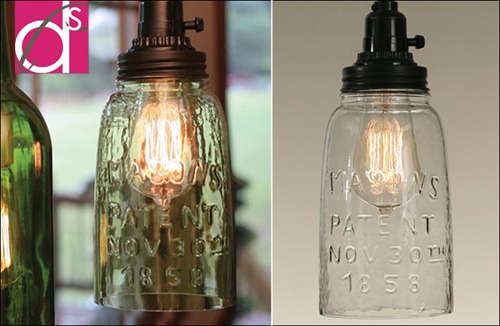
I don’t think the mason jar trend is going anywhere soon, and I love these lights:

mason jar pendant lights

They’d be especially cute in a kitchen or a bathroom. They are a great mix of vintage and industrial!

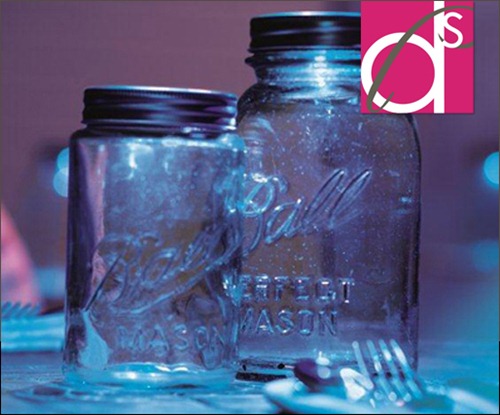
And these are actually solar lights, how cool is that?:

solar mason jar lights

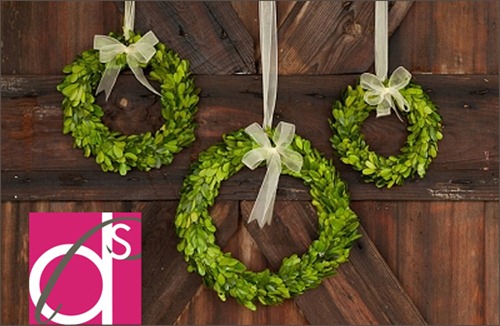
I love the Decor Steals boxwood wreaths – you can see how I use mine year-round here:

preserved boxwood wreaths

I would fill my house with them this time of year if I could! They are so classic and pretty!

These ladders are so functional – I love to see them used in a bedroom for extra blankets:

 vintage wooden ladder

But how about in a bathroom for towels, or for Christmas – hang ornaments from them, or Christmas cards?

Today’s deal is another versatile one – their reproduction feedsack fabric is always a hot seller and I’m sure today will be no different!:
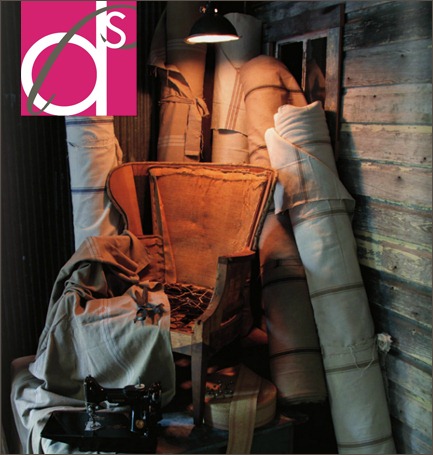
Feedsack sewing fabric It comes in five different colors and I think it would be SO lovely as a Christmas skirt!

The best news today is that Decor Steals is giving away a $50 credit to two lucky readers. They are also throwing in a surprise box to a reader as well!

Here’s how to enter to win one of two $50 credits and the free goodies to Decor Steals:

1. Leave a comment here. What did you eat yesterday? We made prime rib instead of turkey – it’s become a tradition for us. :) SO good. 

2. Visit Decor Steals here and check out their pick steals page. Which item do you want to see offered in the future? Come back here to let us know in a comment.

3. Visit their Facebook page and “like” it here. Let us know you did in another comment. (Or let us know if you already do!)

4. Subscribe to their email list here (you’ll get email notices about the new deals) and if you do (or are already on the list), leave one more comment here.

* You can enter one, two, three or four times – it’s up to you! All options are not mandatory to win.

* Remember if you comment anonymously or you have a private blog, please include your email address in each entry, and spell it out with “at” and “dot” to avoid any spammy emails coming your way.

This giveaway is open to the contiguous US only. It will close this Monday, December 2 at 9 a.m. EST.

Have a wonderful weekend!
DIY work bench, YES!

Hey there everyone! Are you ready for Thanksgiving? I’m excited to sleep in, stay in my pajama pants all day and eat with family. :) I hope yours is wonderful!

So remember last week when I showed you the massive clean out in the garage? I’m SO happy with it. There was one last project I wanted to complete in there and it was actually fairly quick and easy AND inexpensive. The trifecta!

This is the area I was planning on addressing:

I’ve had my saw on that storage cabinet for years now and it worked OK but not great. I wanted to have a lot more room to spread out. My dream has always been to have a work bench in the garage and that dream was much easier to realize than I thought. :)

I put a plan together (in my head) and gathered my supplies at True Value. Originally I thought it would be a lot more elaborate than it ended up being. I am quite sure you could do this, even if you’ve never built anything! And if you’ve never built anything I don’t know if you need a work bench, but whatever. Let’s pretend.

I got two 1 by 4’s and one 4 by 4 – all eight feet long. (I already had most of another 4 by 4 leftover from another project too.) I measured out how long I wanted the bench to be and it turned out to be right at eight feet, which was a bonus because I didn’t have to have to make nearly as many cuts.

The first step was to figure out how high I wanted the table to be – I knew I wanted it taller than the storage containers because I wanted to keep them underneath. Then I attached the board (making sure it was level) to the studs along the wall with three inch screws:

building a work bench

Next I held the 4 by 4 post up to that to see how tall I wanted them to be. I marked it at the top of the 1 by 4 on the wall, because I wanted it the same height, since my plywood would sit on both the board along the wall and the 4 by 4’s in front. Does that make sense? It will in a minute. ;)

I cut three posts down to use as supports along the front, then placed the plywood (I used a 4 by 8 piece cut right down the middle, so two feet wide) on them and started screwing them together:

I did make sure the posts were level before securing them to the top. I put four screws in through the top of the plywood into each of the posts. I used drywall screws for this part – I use those for a lot of woodworking projects since they are so easy to get into the wood.

I secured all three posts and then did the same at the back of the plywood, up against the wall:

You could easily do that part first and then the posts, it doesn't matter what order you do it in.

Here’s where I opened my mouth, stuck in my foot and said, “Wow, this is going so well!”

WHY? Do I EVER learn?

Cause then I messed up.

I used the second 1 by 4 as an “apron” across the front – I just thought it finished it off nicely and looked a little better. Then we (my sis actually) realized the storage containers wouldn’t fit underneath with it on there. So we took that off, put them under there, then started putting it back on, but realized the container doors to the right wouldn’t open with the wood along the front:

work bench in garage

So instead I used a scrap 1 by 2 I had – losing those two inches made it so I could open everything just fine. (As you can see above.)

I secured that to the posts with drywall screws too:

building a work bench

You can see in that photo how simple this whole thing was – it’s just a brace along the back wall with plywood on top and 4 by 4’s as supports in the front.

Super simple design:

DIY workbench garage

I didn’t secure the posts into the cement floor – there’s no need to. The weight of the wood keeps them where they are.

Since the table is so close to the door I knocked down the edges and corners just a bit for safety:

DIY workbench

Can I just say how much I love this?? I LOVE IT!! Why did it take me so long to do this?

I finally have space to spread out – there’s plenty of room for me to work and in my old workshop area it was impossible:

Easy DIY workbench

Plenty of room for a table saw too. ;) I got one a few weeks ago but it was messed up so I took it back. I’m going to try again soon.

Even with our slight mess up this project was much easier and quicker than I thought it would be. And that NEVER happens. The total cost was less than $50 – the main expense was the piece of plywood that was $25. (The thickness is more than half an inch for extra strength.)

It’s silly but it makes me feel like a real DIYer:

easy DIY workbench

And it looks so much cleaner and nice compared to how this spot used to look! Love.

The garage is like night and day from before – I can’t believe how much better it looks and functions now. It’s stayed clean for three weeks now – that’s how I know it finally works for us! Isn’t that a great feeling?


I was one of the bloggers selected by True Value to work on the DIY Squad. I have been compensated for my time commitment to the program as well as writing about my experience. I have also been compensated for the materials needed for my DIY project. However, my opinions are entirely my own I would have done this project anyway and I have not been paid to publish positive comments.

For more project ideas visit True Value here or their Facebook page here.

MILANGO YA MBELE YA NYUMBA MBAO YA MNINGA, MKONGO...MAIN ENTRANCE HOME DOORS DESIGNS AVAILABLE BY ORDER!!

Habarini wadau wa FancyHomeDecor, mniwie radhi kwa kuwa kimya kwa mda kidogo ni kutokana majukumu mbalimbali yaliyokuwa yamenitinga...Sasa nimerudi tena na safari hii ningependa kuwatangazia kuwa nitakuwa napokea oda za ku design milango ya nyumba ya mbao aina yoyote, kwanzia mninga, mkongo etc...kwa design yoyote na katika finishing nzuri.

Kwa leo hizi ni baadhi ya design ambazo unaweza kutengenezewa na FancyHomeDecor.

KUWEKA ODA CALL: 0712 023102
KARIBUNI WOTE...


Nitaendelea kuwaletea design nyingine mbalimbali nzuri na kwa bei nafuu....

You are most welcome...

Chef John’s Taking a Break!

One of the things I love about my partnership with Allrecipes.com is that they actually make me take these things called, “vacations.” Apparently these periodic breaks are quite common in corporate America, and supposedly help the employee relax, rest, and recharge. Since I’m going to be golfing, that’s not going to happen, but still, I appreciate the time.
 

I’ll be off for a week, and by “off,” I really mean “off.” While comments will be published, I will not be monitoring the blog while out, so when it comes to cooking questions, you’ll be at the mercy of fellow foodwishers and Google. Good luck with that. Anyway, I hope you have a great Thanksgiving, and I look forward to getting back to work next week. Enjoy!
.

Ultimate Mashed Potatoes - Not Your Every Day Recipe

Every year around holiday time, I see people posting recipes for low-fat and no-fat mashed potatoes, which I find as sad, as I do perplexing. There’s no sane doctor alive, or bartender for that matter, who will tell you eating a scoop of these mashed potatoes a few times a year will, in any way, negatively effect your health.

So what’s up with the reduced-fat holiday potatoes? Isn’t that the reason we try to eat well all year, so on Thanksgiving we can bathe guilt-free in gravy? Sure, serving your loved ones potatoes with a pound of butter in them on a regular basis would be cause for alarm…or at least a glance at any recently purchased life insurance policies…but for truly special occasions, it’s crazy not to enjoy such a pleasure.

By the way, this is no viral-video gimmick. Those star chefs you see Anthony Bourdain dry-humping every week (sorry, I was channeling my inner Anthony Bourdain) all use at least this much butter, and as legend has it, some even flirt with equal parts. Of course, they call it pomme purée, and say it with a French accent, but it’s the same stuff.

Nobody says you have to go full Joël Robuchon and actually use this recipe, but please try to force yourself to add more than the few meager tablespoons that get us through the rest of the year. Anyway, if you’re never experienced this ethereal pleasure, I hope you make them a part of your next special occasion menu. Enjoy!


Ingredients for 8 portions:
3 1/4 pounds russet potatoes (3 or 4)
Note: this will not work with red potatoes, as they are too waxy
1 pound unsalted butter
1/4 cup hot milk
salt and pepper to taste

Note: Thanksgiving gravy warning! For obvious reasons, these aren't very sturdy mashed potatoes, so be careful with the gravy. If you totally drench them they'll basically melt.

Chevron, take two

Hey everybody! Happy Thanksgiving week! I won’t be posting much this week, and today’s post is short and sweet. I’m taking most of the week off and hope you’ll get plenty of family and rest time in too!

So here it is – my second attempt at chevron. If you remember I tried it a few months ago with my chevron Frogtape:

WELL. Funny story. When I was cleaning out the garage a couple weeks ago I realized I used the WRONG chevron tape. I work with Frogtape and they sent me their new shape tape before it even came out in the stores. This one must have been an early prototype that they didn’t use.

I grabbed this one off the shelf and didn’t even realize it was different from the others. The actual chevron Frogtape is actually much more chevron-y and less Charlie Brown-y.

I laughed out loud when I realized what I had done. Leave it to me. So last week I decided to do another little redo to that trash can.

I spray primed it and then spray painted it white…again. :) Then I played around with the tape to figure out the design I wanted. I was originally planning a thin line of chevron around the top and bottom but decided on a slightly different design instead:

chevron shape tape

I just offset the second line a bit to make it not exactly chevron.

I rubbed some gold rub n buff in between the tape and that was it!:

chevron painters tape

I decided simpler was better. :) Much better. This I love!

Their shape tape comes in three different designs – chevron, scallop and wave. (I showed you how I used the scallop design here.) As you can see you don’t have to use them as they come -- play around with them a bit to make your own look!

Want to try them out yourself? (You can see the designs here.) Leave a comment here this week and let me know which one you’d like to try! We’ll give away three of each design. I’ll announce the winner next week!

P.S. My friend Marty at A Stroll Thru Life has a lovely blog and highlighted me last week – go here to check it out!

A Thanksgiving Side Note

Thanksgiving is almost here, and we'll assume you already have a great turkey and gravy recipe, so today we are focusing on the side dishes (btw, if you are still sans bird recipe, don't panic, and just check out our critically acclaimed, two-part video series, How to Make Turkey and Gravy).
 

Everyone knows, it's not a great turkey that makes the meal, it's what you pair it with. What good is a beautiful bird sitting next to a bunch of so-so sides? With that in mind, here's a little collection of thanksgiving appropriate dishes from days gone by. Don't let the poor producton value on the older videos fool you, these are some great sides, and would make a lovely addition to your holiday spread. Enjoy!

Creamed Spinach


Creamy Corn Custard


Pecan and Apricot Sourdough Bread Stuffing


Green Bean and Blue Cheese Gratin


Lime and Chipotle Glazed Sweet Potatoes


Celery Root and Potato Puree


Cold Broccoli Salad


Cheesy Broccoli Gratin


Butter Roasted Cauliflower


Reindeer games

Hey folks! I’m going to keep this one quick because I have a cold and can’t focus on one thing too long. I looked for my keys for 30 minutes last night and looked for my phone for 20 minutes this morning. My brain is MUSH.

So earlier this week I took a break and went into TJMaxx for a bit. I found this lovely lady:

decorative reindeer

I put her on Instagram and mentioned I was going to glitter her up. I got some “Noooooo's” and some “heck yeah’s” and also a “I don’t think she’s a she,” which is true but it’s just to elegant to be a boy. So I’m saying girl. ;)

Anyway, I wasn't going to glitter all of her – just his her antlers. I used the bag to cover the rest of her up and then taped around the antlers:

Christmas reindeer

To make this as quick and easy as possible I used this Krylon spray paint to glitter them:

glitter spray paint 

OK -- I bought this a year or two ago and I don’t I’ve ever used it. These came out a couple years ago and I saw blogger after blogger had issues with this spray paint. I chose to believe that my can was different.

Well, it wasn’t. ;) It was a MESS. It sprayed great for a few seconds, then started sputtering and spraying all on it’s own. Then the glitter wouldn’t come out, just the coating stuff, and it was pretty much a disaster:

wow

That’s actually the good side – the color was horrible, it didn’t cover well and just looked like butt. Not the look I was going for. I think this paint would be good to give something a light, glittery sheen, but I wanted more for this project. 

Then it wasn’t drying so I ended up trying to wipe it all off and it was just a science fair. (That’s what we say when something is a disaster. This qualifies.)

So I was on to plan B -- the more time consuming plan. I grabbed my glitter glue and silver glitter and started doing it by hand. I got this glitter tray at Michael’s this past summer and it worked AWESOME:

glitter tray

You can lay items on it to dry and then when done just take that top part off and there’s a hole in the corner so all the excess glitter goes back in the container. It worked great, I just wish it was a little bigger!

So, after about 20 minutes of glittering she ended up with some major bling:

Christmas reindeer

I actually REALLY love how it turned out! She’s beeeeautiful! Yes, it was pretty to start, but I can never leave well enough alone, you know this.

The silver is SO pretty:

glittered antlers

Who knows if it will last till next year, but for now she looks lovely:

Christmas reindeer decorHave you tried that glitter spray paint? Did you have the same problems I did? Have you started decorating for Christmas? This is my first piece – more will come out this weekend. :) By the way – have a great one!!

Turkey Matzo Ball Soup – That Old Thanksgivingukkah Classic

Soup is always an obvious choice for leftover-turkey-themed videos, but it wasn’t until I heard about “Thanksgivingukkah,” that I knew that soup would be turkey matzo ball.

This year, Thanksgiving and the first day of Hanukkah fall on the same date for the first time since 1888, and this rare occurrence has been deemed, “Thanksgivingukkah.” And when we say rare, we mean rare, as this convergence will not happen again for another 77,000 years!

As I mention in the video, while pleased with my matzo ball skills, I’m not sure I’ve ever had the real thing (if that even exists), and so I don’t have anything to measure mine against. I’ve had it at delicatessens out here, but never in NYC, or other more legit locations. I’m using what seems to be a fairly standard formula, and they are quite light and tender, so until informed otherwise, I’m going assume these are pretty good.

However, there is one thing I would love to know. Why do “we” boil the matzo balls in salted water, instead of the soup? I’ve heard it’s so the broth doesn’t get cloudy, but is that really all there is to it? Speaking of the broth, yours will undoubtedly be superior to mine. By the time I got to this video, I only had a few scrawny pounds of meat and bones left, and yet it still came out wonderfully flavorful.

If you use all the scraps from a decent sized bird, you should get an incredibly rich broth, which is exactly what you want to be ladling over your matzo balls. As far as extra ingredients go, I like a minimalist approach with this soup, but of course, feel free to embellish your stockpot with whatever you see fit.

Some of this will be determined by how you season your Thanksgiving bird, and I can personally verify that this year’s Peruvian version worked nicely. So, I hope you enjoy the coming Thanksgivingukkah, and here’s hoping the end of your turkey means the beginning of a delicious matzo ball soup. Enjoy!


Ingredients for 4 portions (I only served one matzo ball, but this will make enough soup for 4 portions with 2 matzo balls per serving):

For the turkey broth:
3-4 pounds of roasted turkey bones and meat scraps (use everything you have, the fattier the pieces the better)
at least 2 quarts water or chicken broth, or enough to cover
1 large onion, chopped
2 ribs celery
- simmer on low for 3 hours or until all the meat falls off the bones and it’s flavorless.
- skim and reserve at least 4 tbsp of the melted fat that rises to the top
- strain, and you should have about 6 cups of broth. If you have more, reduce down to 6 cups (do not season with salt until reduced). If you didn’t get quite 6 cups, just add some chicken broth to make up the difference.

Note: my turkey was already very well seasoned, so I didn’t need to add much to the stockpot. You can adjust your broth according, and can certainly add things like bay leaf, thyme springs, parsley stems, etc.

For the matzo balls (makes 8):
2 large beaten eggs
2 tbsp rendered melted turkey fat
1 tsp fine salt
1/4 tsp freshly ground black pepper
pinch of cayenne
2 tbsp seltzer or club soda
1/2 cup matzo meal
- Mix and chill 30 minutes at least
- Boil in salted water (1 1/2 quarts water with 1 1/2 tablespoons salt) for 30 minutes and serve with turkey broth

For the soup:
2 tbsp rendered melted turkey fat
1 cup diced onion
1/2 cup diced carrot
1/2 cup diced celery
1 garlic clove, thinly sliced
6 cups very rich turkey or chicken broth (see recipe above)
salt and pepper to taste
1 tbsp chopped parsley
1 tbsp chopped dill
8 cooked matzo balls!

Blog Archive